
I always used to wonder how some brands seem to have product photos that just pop. The kind of photos that make you stop scrolling and think, “I need that!” But here’s the thing – product photography styling isn’t some secret only professional photographers know.
You don’t need an expensive studio or fancy equipment to make your products look amazing. Whether you’re a small business owner or a marketer, you can transform your photos from average to eye-catching with a little creativity and the right styling tips. Stick around, and I’ll show you how to elevate your brand and grab your customers’ attention with high-quality product images!
Why Product Photography Styling Matters?
You might be thinking, “Why should I care about styling my product photos?” Well, styling your product is more than just making things look pretty. It’s about creating an image that resonates with your brand identity, speaks to your target audience, and ultimately encourages potential customers to hit the buy button.
Styled product photography can help:
- Communicate your brand’s personality and values.
- Highlight the best features of your products.
- Create a visually appealing experience that draws people in.
- Ensure consistency across your images for cohesive branding.
If you’re ready to start styling your product photography, here are some expert tips to get you started.
a. Start with a Strong Product Photography Style Guide
A product photography style guide is like your roadmap for every photo you take. It ensures that every shot aligns with your brand’s vision and message. The guide should include details about:
- Lighting preferences: Do you prefer natural light or artificial lighting for your shoots? Each type has its own vibe. Natural light is soft and airy, while artificial lighting allows you to control shadows and highlights more precisely.
- Color palette: The colors in your images should align with your brand colors to enhance recognition.
- Mood: Is your brand playful or professional? The tone of your photos should match.
- Props and backgrounds: Think about how different backgrounds and props will enhance your products. You want them to complement, not distract.
The beauty of a product photography style guide is that it keeps you consistent across all your photos, ensuring that your brand looks polished and professional.
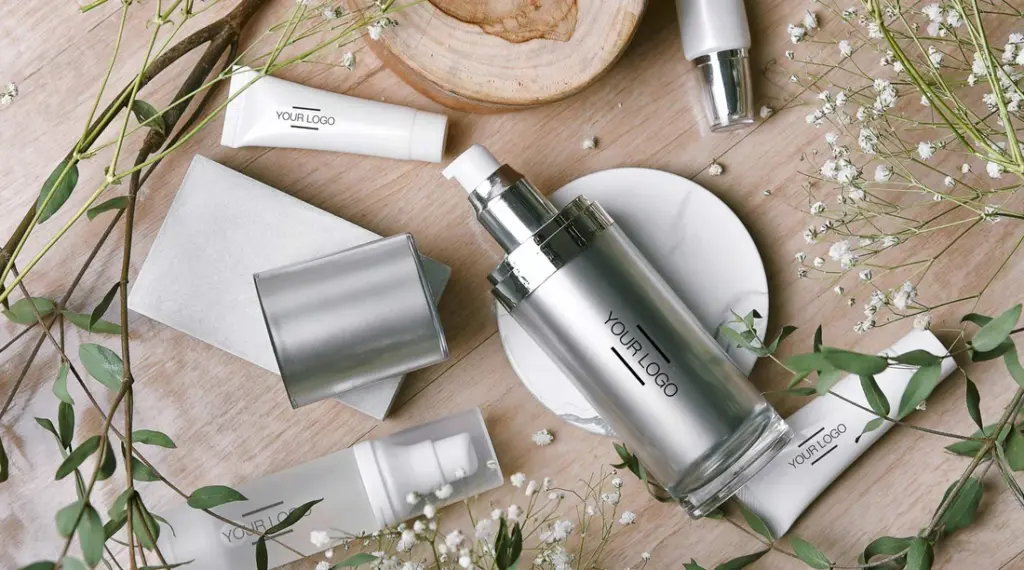
b. Choose the Right Props and Backgrounds
Props and backgrounds are key when it comes to product styling photography. The right elements can elevate the look of your photos, while the wrong ones can detract from your product.
Here’s how you can choose
- Keep it simple: Your product should always be the focus, so avoid using too many props that take attention away. Think about a single item like a small plant or a minimalistic table.
- Use complementary colors: The background and props should complement your product’s color palette. For instance, if you’re selling skincare products, a light, neutral background can make the colors pop.
- Texture adds depth: A textured background like wood, marble, or fabric can create depth and interest, helping your product stand out even more.
A hero shot is often the star of the show, so make sure your props and background support it, but don’t overpower it.
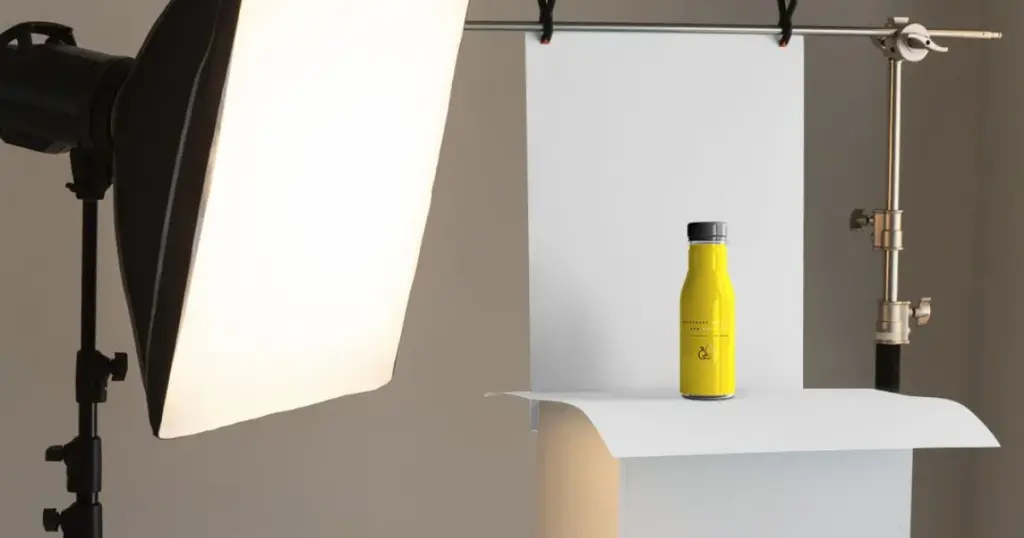
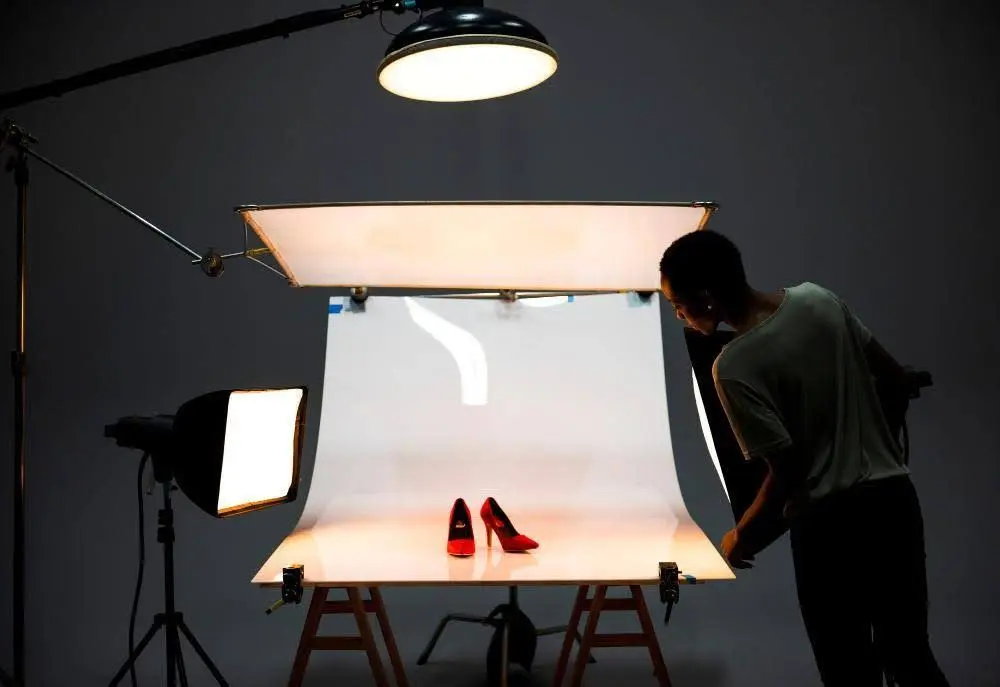
c. Lighting: Natural vs. Artificial
Credit: dresma.com
Lighting is the cornerstone of product photography styling. The right lighting can make your photos look polished and professional, while bad lighting can make even the best products look unappealing.
Natural Light
Natural light is a great option if you want to create soft, flattering images. It’s especially useful for creating that clean, airy feel. However, keep in mind that you need to work with the natural light available to you, which may change throughout the day.
- Best for: Jewelry, beauty products, and lifestyle shots.
- Ideal when: You want to create a calm and warm atmosphere.
Artificial Lighting
If you want more control over your lighting, artificial lighting is the way to go. It gives you the ability to adjust shadows, highlights, and brightness to create dramatic effects or soft glows.
- Best for: Products that require sharper focus or have intricate details.
- Ideal when: You’re shooting indoors or need to shoot at any time of day.
d. Focus on Consistency
Consistency in your styled product photography is essential for building a strong visual identity. Imagine browsing through your website or Instagram feed and seeing a mishmash of photos with different styles, colors, and lighting. It’s not a good look.
To ensure consistency:
- Stick to your style guide: Always use the same lighting, color scheme, and composition.
- Create mood boards: These can help you visualize how your photos will look when combined, and they ensure you stay on track with your overall aesthetic.
- Use similar props and backgrounds: This helps create a cohesive look across all your images.
e. Capture Multiple Angles
Credit: skylum.com
One of the best ways to showcase your product’s features is by shooting from multiple angles. While a hero shot is great for a close-up, you should also consider taking shots from above, side views, and close-ups of any unique details.
Some tips
- Show off the key features: If your product has intricate details, like a texture or design, make sure to highlight that with a close-up shot.
- Take lifestyle shots: Show your product in use to help potential customers visualize it in their own lives.
f. Utilize the Power of Mood Boards
A mood board is essentially a visual representation of the style, colors, and vibe you’re aiming for. It’s like your creative blueprint and a great way to organize your thoughts before you start shooting.
How to make a mood board?
- Gather inspiration: Browse Pinterest, Instagram, or your favorite websites for images that align with your vision.
- Color palette: Choose colors that match your brand and bring out the essence of your product.
- Textures and patterns: Decide if your product photos should have a soft or edgy vibe by picking out textures like linen, wood, or metal.
Pro Tip: Keep your mood board visible while you shoot so that you can stay aligned with your original vision!
g. Add a Personal Touch
Credit: bzmgraphics.com
Even if you’re aiming for professional photos, don’t forget to add a bit of personality! Whether that’s through creative backgrounds, props, or the way you arrange your product, adding your personal touch can make the images feel more authentic.
h. Don’t Forget the Product Stand
A product stand can be a game-changer when it comes to product photography. It helps elevate your product and gives it that professional look. Whether you’re photographing jewelry, tech gadgets, or beauty products, a well-placed product stand can make all the difference in creating an appealing visual.
Pro Tip: For truly standout images, we at Product Captures specialize in product photography that highlights your product’s unique features in the best possible light!
The Bottom Line
In the end, product photography styling is all about creating an experience that reflects your brand and resonates with your customers. With the right mix of props, backgrounds, lighting, and consistency, you can create stunning product images that attract attention and inspire sales.
Remember, your product photos are your first impression with potential customers, so make sure they leave a lasting one!
Time to get shooting!
FAQ’s
Here’s a quick look at some FAQs to help you master product photography styling.
What is product photography styling?
It’s the art of arranging your products with props, lighting, and backgrounds to highlight their best features and reflect your brand’s vibe.
How can I make my product photos eye-catching?
Focus on clean compositions, use the right lighting, and incorporate unique props. Shoot from different angles to really show off your product.
Natural or artificial lighting for product photos?
Natural light is soft and airy, while artificial lighting gives you more control for dramatic effects. Pick based on the vibe you want to create.
What are props in product photography?
Props are items used around your product to add depth and interest and highlight your product’s best features.
How do I create a product photography style guide?
Your guide should include lighting preferences, color palettes, props, and overall mood to keep your photos consistent and aligned with your brand.